Summer Cucumber Salad

Julienned Cucumbers, carrots in a yogurt sauce

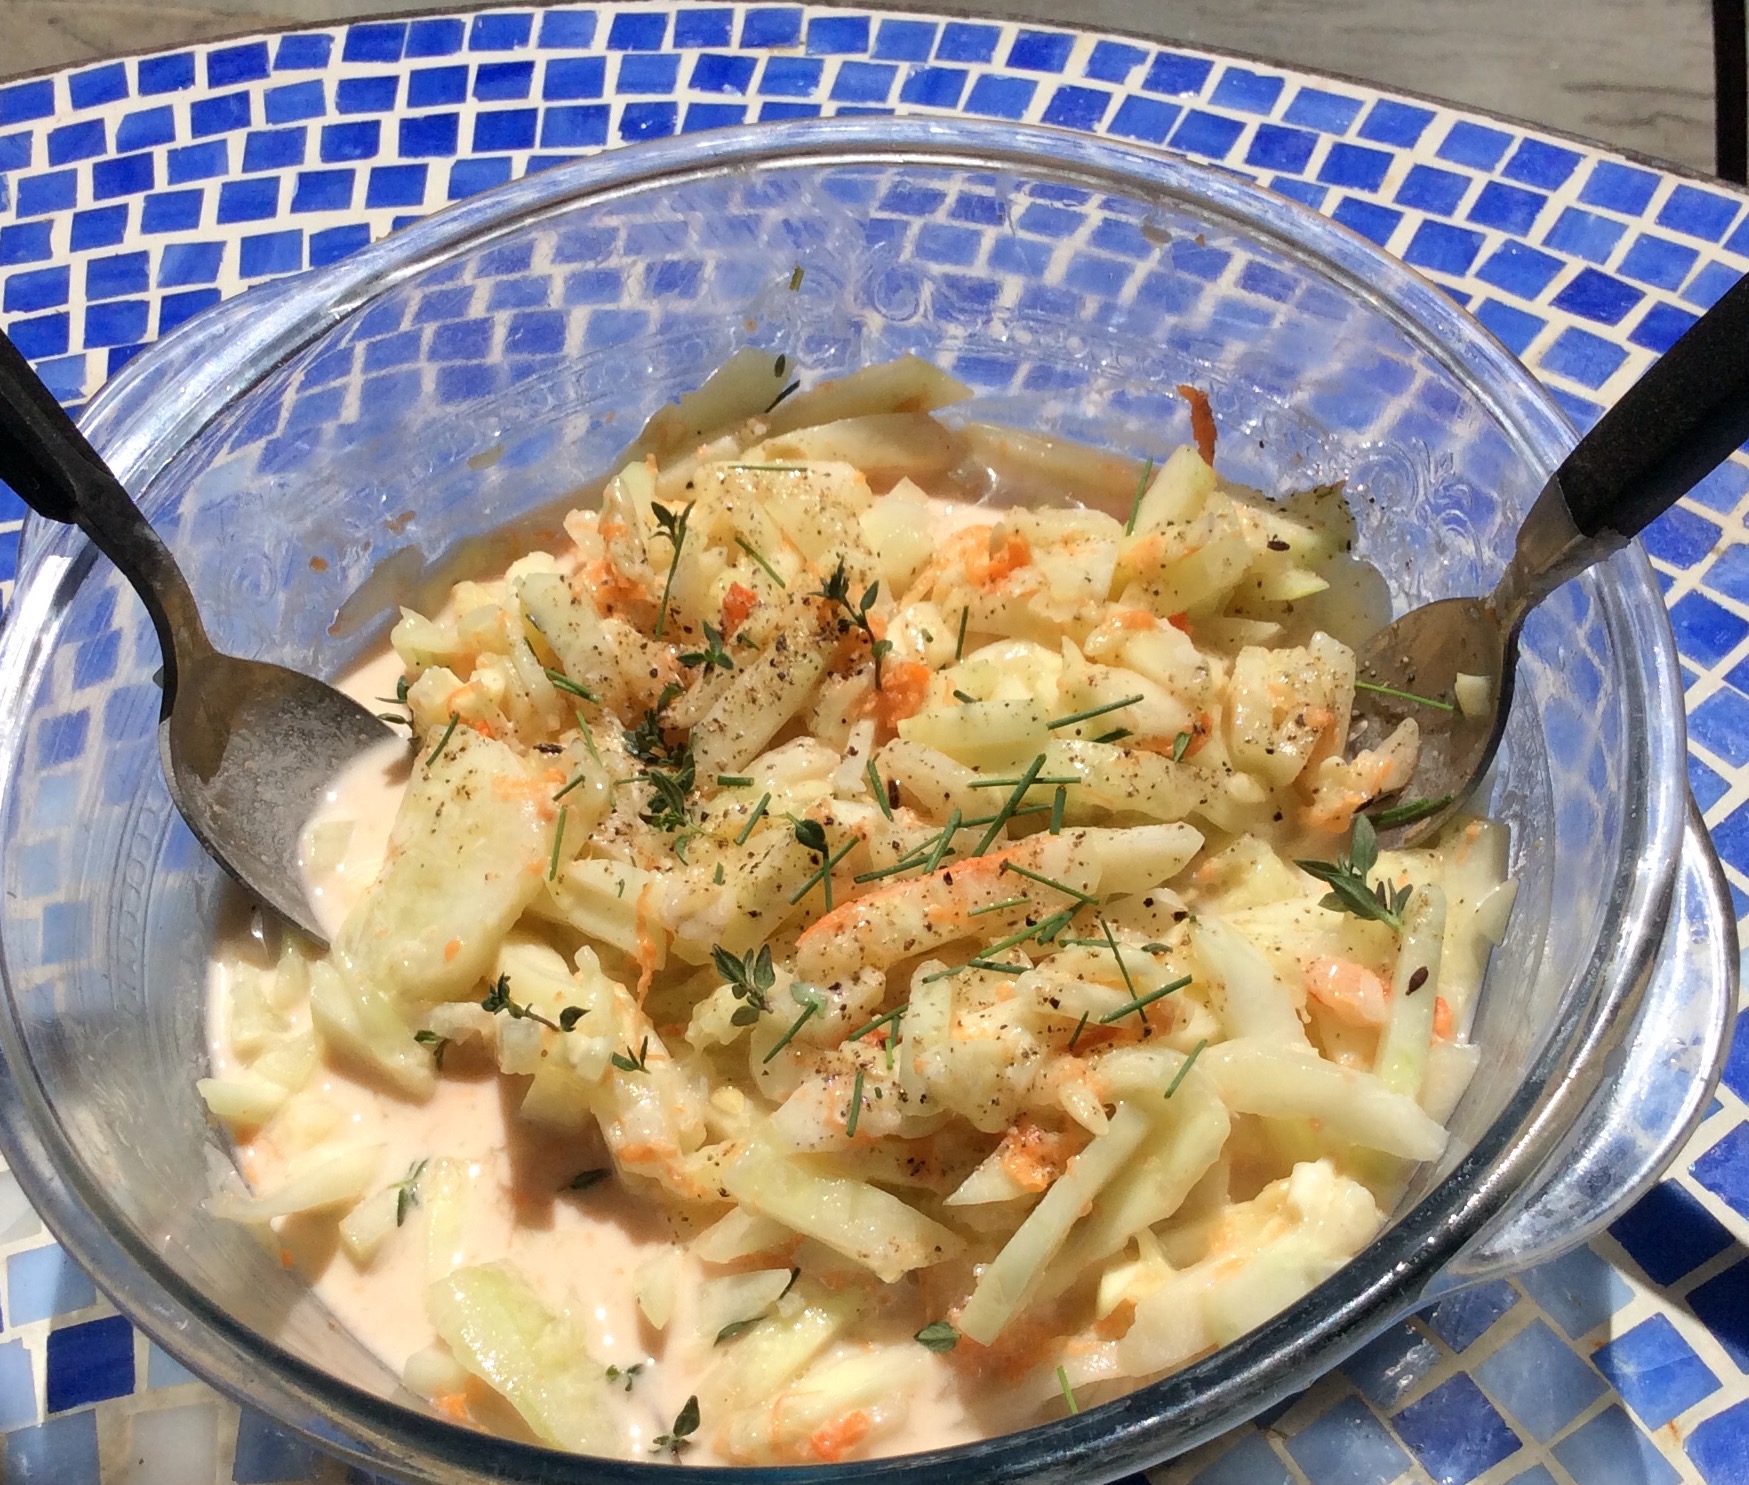
Summertime Cucumer Salad

My German grandmother was a terrific cook. One of her specialties in summer was a refreshing cold salad made of sliced cucumbers in a creamy dressing of red wine vinegar and sour cream, topped with fresh dill or chives. My updated version juliennes the cucumbers, adds carrots and a yogurt-based dressing instead of sour cream. It’s easy to make, very tasty and refreshing as an accompaniment to a summer meal such as grilled chicken or burgers. I like it by itself for a light lunch as well. It also keeps in the refrigerator for at least a few days and gets even more flavor.

It’s a funny thing- somehow marinating the cukes in this dressing makes them more digestible- as I find raw cucumbers sometimes upset my stomach. This salad never has. You can do the cucumber/salt drainage* technique in advance if you like but I confess I rarely have- as I am too impatient!

INGREDIENTS (serves 2-3)

  • 2-3 cucumbers ( medium size- if very large one might be enough)
  • 1/2 medium carrot
  • 1/2-1 cup plain yogurt ( I use whole milk Greek type)
  • 1/3 cup red wine vinegar (it sounds like a lot but the cukes need this amount)
  • 1/2 tsp. Xylitol (see my previous blog posts for more details about this natural no-sugar sweetener)
  • 1/3 cup chopped green onion (optional)
  • salt free seasoning ( or 1 tsp salt if you like)
  • fresh herbs- chives, dill or thyme

TO DO

  1. Make the sauce first so the flavors can meld. Mix the yogurt, red wine vinegar, xylitol and seasonings (not the herbs)– I use a wisk. Taste to make sure it has enough vinegar- should be tangy.
  2. Peel and slice thinly or julienne the cukes- I use a Mandolin with the julienne blade.
  3. Wash carrot, peel or brush well. Juienne or cut into matchsticks and combine with the cucumber; add green onion (optional)
  4. Add dressing and mix well.
  5. Let sit in refrigerator for at least 1/2 hour before serving.
  6. Garnish with fresh chopped herbs.

* To drain and remove excess moisture from peeled, sliced cucumbers in advance of making the salad; put them in a colander with a larger bowl underneath. Sprinkle 1 tsp. salt or more depending on amount of cukes, (sprinkle lightly) and let sit for approximately an hour. You can then blot with paper towels. It does help to keep them crisper and less watery in the salad.

Enjoy!

www.type2delicious.com

Advertisement

Rainbow Swiss Chard

Such pretty rainbow colors!

Such pretty rainbow colors!

The chard stems are cooked first

The chard stems are cooked first

The final cooked chard

The final cooked chard

RAINBOW CHARD

Chard (Swiss Chard) was a new vegetable to me. Rick had made it previously, so I wanted to try it. This is really his recipe.

We buy rainbow chard at the farmer’s market– so pretty, so easy and so delicious! I love the colors! If available, choose the rainbow variety, though the plain Jane is just as tasty. Also, of course, both are low carb, and full of good greens; see the link below for nutritional info. http://www.whfoods.com/genpage.php?tname=foodspice&dbid=16

INGREDIENTS

  • 1 -2 bunches Rainbow (or just green) Swiss Chard
  • 1-2 Tbsp. Olive oil
  • 3-4 Tbsp good balsamic vinegar
  • Salt free seasoning/pepper to taste

TO DO: 1. Wash the chard (I use a large colander and wash each large leaf ) 2. Strip the leaves from the stems and cut off ends and discard any large, tough stems. 3. Chop stems into 1/2 or 1″ pieces, then chop leaves into I” pieces; separate stems from leaves. 4. Preheat a large sauté pan, add oil. Add vinegar. 5. Saute stems for approx. 10 min., then add leaves, and saute approx another 10 min. until vinegar is reduced. 6. Add spices and seasonings to taste. Enjoy! www.type2delicious.com

Low Carb Clafoutis–Fun Fruit Dessert!

No-sugar fruit dessert made with peaches

Summer fruits beg to be eaten and one delicious way is a low carb, no-sugar version of the French fruit dessert, clafoutis.

I make it with Xylitol*, a low carb sweetener that my readers will recognize- it has no weird aftertaste and allows folks with carb restrictions to enjoy at least some sweet tasting desserts to their low carb diet.

Clafoutis! Just the name makes me smile- such a cute word for such a tasty dish! I made this version mainly with peaches, (and a nectarine), but I’ve made it with plums with just as delicious results; (if you read my previous recent blog posts, you’ll know we had a bumper crop of plums last year).

Clafoutis is originally from France, made with dark cherries that traditionally aren’t pitted. There’s a chemical, amygdalin, in the pits which gives a unique flavor. However, I’ve never made it that way. In any case, I’ve been a clafoutis fan this summer especially, and have made it almost every time we’ve had dinner guests. I can’t have it too often!

In winter or fall, it can be made with apples and/or pears. I look forward to trying it then too, but now I am reveling in the summer fruit version.

INGREDIENTS (serves 2-3)

  • 4-6 fruits sliced, – peaches, plums, nectarines (depending on size), in any combination; peeled if you like, (I usually don’t peel them). The main thing is to cover the bottom of the pie plate.
  • 3 eggs, beaten
  • 1 1/3 cup milk (or milk substitute- I’ve used almond milk, for instance)
  • 2/3 cup flour- I use King Arthur whole wheat white flour
  • 2 Tbsp. Almond meal (Trader Joe’s has this–I keep a bag in my freezer–lasts a long time)
  • grated peel of one small lemon
  • 1 Tsp. Vanilla
  • 1 pinch salt
  • 1 tsp. Cinnamon
  • 6 Tbsp. Xylitol
  • butter for greasing pan

TO DO: preheat oven 375 degrees F

1. Butter a 10″ pie pan (I use a glass one) and sprinkle 1 Tbsp. of the Xylitol  over the bottom.

2. Arrange the fruit slices so that they cover the entire bottom of the pan. Sprinkle 2 more Tbsps. of Xylitol over the fruit.

3. Combine the remaining Xylitol, eggs, milk, flour, lemon zest, almond meal, vanilla and salt (remember, just a pinch- about 1/4 tsp.); blend in a blender or use an immersion blender.

4. Pour this liquid over the fruit in the pan.

5. Bake for 50-60 minutes until “toothpick” firm and the top is lightly brown. Remove from the oven and place on a rack.

6. Let stand at least 30 minutes before slicing. (if you have no restrictions, vanilla ice cream is great with this.)

That’s it! A real treat!

* https://en.m.wikipedia.org/wiki/Xylitol

Enjoy! www.type2delicious.com