The First Video! How to Roast Delicata Squash

Here’s the link to the first step-by-step video!Type2delicious video!

I’m excited to announce the first Type2delicious video! My brother Dan Mainzer, a professional photographer/videographer, (Mainzerphotography.com) was here in Santa Cruz last winter, and we collaborated on a series of three recipe videos. This first one, how to roast Delicata Squash, will be followed by How to Create a Fruit Salad with No-Sugar Raspberry Sauce, and a Making a Scrumptious Cheesy Appetizer.

I hope you like them! Please let me know if you have any questions or comments.

Enjoy!

Susan

Type2delicious

SHAKSHUKA–Middle Eastern Brunch Delight

dish of poached eggs on top of chopped vegetables and tomatoes

Delicious Middle Eastern
egg-veggie brunch dish

Shakshuka--final with poached eggs on top of veggies/tomatoes

Shakshuka–final with poached eggs on top of veggies/tomatoes

I want to share a new breakfast/brunch discovery–Shakshuka. This is a wonderful skillet dish that originates from the Middle East; I’ve been told it’s a staple in Israel; (not sure what other countries). It’s very delicious and is easy to customize and prepare. You can change out the spices and throw in whatever vegetables you have on hand. For my version I used chopped red pepper, onions, mushrooms, carrots, garlic, and jalapeño peppers (diced) and plum tomatoes.

We had it for brunch recently and were knocked out by the combination of sweet tomato flavor, vegetables, spicy undertones of the jalpeno (but not too spicy) and the creamy, rich eggs. It’s now one of our favorites.

This is a great dish to serve company or enjoy with your family when you have a leisurely weekend brunch. I suggest you serve with crusty whole grain toast to mop up the delicious sauce!

I’ve been out of town and apologize for not posting for a few weeks. Fall is in the air; next I’ll post a hearty fall vegetable stew–my version of Ratatouille. Please follow–stay tuned!

Shakshuka

INGREDIENTS (serves 2-3)

  • 4-6 large eggs (for 2 eggs per serving)
  • 2 Tbsp Olive oil
  • 1 large onion, chopped into 1/2″ pieces (1 Cup)
  • 1 large red pepper, seeded and chopped
  • 1/2-1 cup chopped mushrooms (I use Cremini)
  • 1 cup carrots; chopped into 1/2″ pieces
  • 1 small can diced Jalapeño peppers (more if you like it spicier–or add tabasco)
  • 2-4 cloves garlic, chopped fine
  • 1 tsp. ground cumin
  • 1 tsp. sweet or smoky paprika
  • 1 tsp. ground tumeric
  • 1 28 oz. can of diced plum tomatoes, including the juice
  • no salt seasoning or 1/2 tsp. salt depending on your situation; ground black pepper
  • Feta or Goat Gouda, depending on your tolerance (Rick only eats goat cheeses, so we use that)
  • optional: Cilantro and/or oregano for garnish

TO DO:

1. Heat the oil in a large deep skillet (I use an AllClad pan)

2. Add onion, sweet pepper, mushrooms, carrots, garlic, jalapeños, spices, seasonings. Saute until tender, but not browned–about 10 minutes.

3. Stir in tomatoes and juice. Bring to a boil, then reduce heat to simmer about 10-12 minutes, uncovered; stir occasionally.

4. Crack each egg individually into a small bowl, and and carefully add, one at a time, on top of the vegetable mixture.

5. Cover, reduce heat and cook 5-8 minutes, until the whites are set and yolks are firm but still soft.

6. Serve with grated or crumbled cheese, oregano and/or cilantro.

That’s it! Pretty easy and delicious- a feast for the eyes and…!

Enjoy! www.type2delicious.com

Diettogo- Reviewing Prepared Meals for Diabetes

imageThis is a departure from my usual posts. I was approached by Diettogo.com, a company that offers a prepared meal service, including special selections for diabetes, and was asked to try a week’s worth of the foods. I agreed and was sent a large insulated box of foods, under lots of reusable ice packs, packed with a varied selection of 9 meals–including 3 meant for breakfast and 6 for either lunch or dinner; up to me.  A major factor of the meals is low carbs; although many of the meals had 45 carbs/meal–the highest amount recommended for diabetics to have in one meal, according to the registered diabetes dietitian whose workshop we attended- see my blog post, “The Journey,” https://type2delicious.com/the-type2-delicious-journey-welcome/

Another thing is that you can customize your orders and exclude anything that you may be allergic to, such as peanuts.

Here’s my review; not of every meal but highlights, etc.; what I liked best and why:

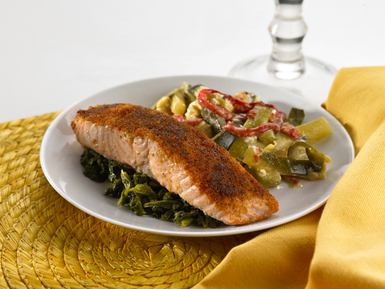
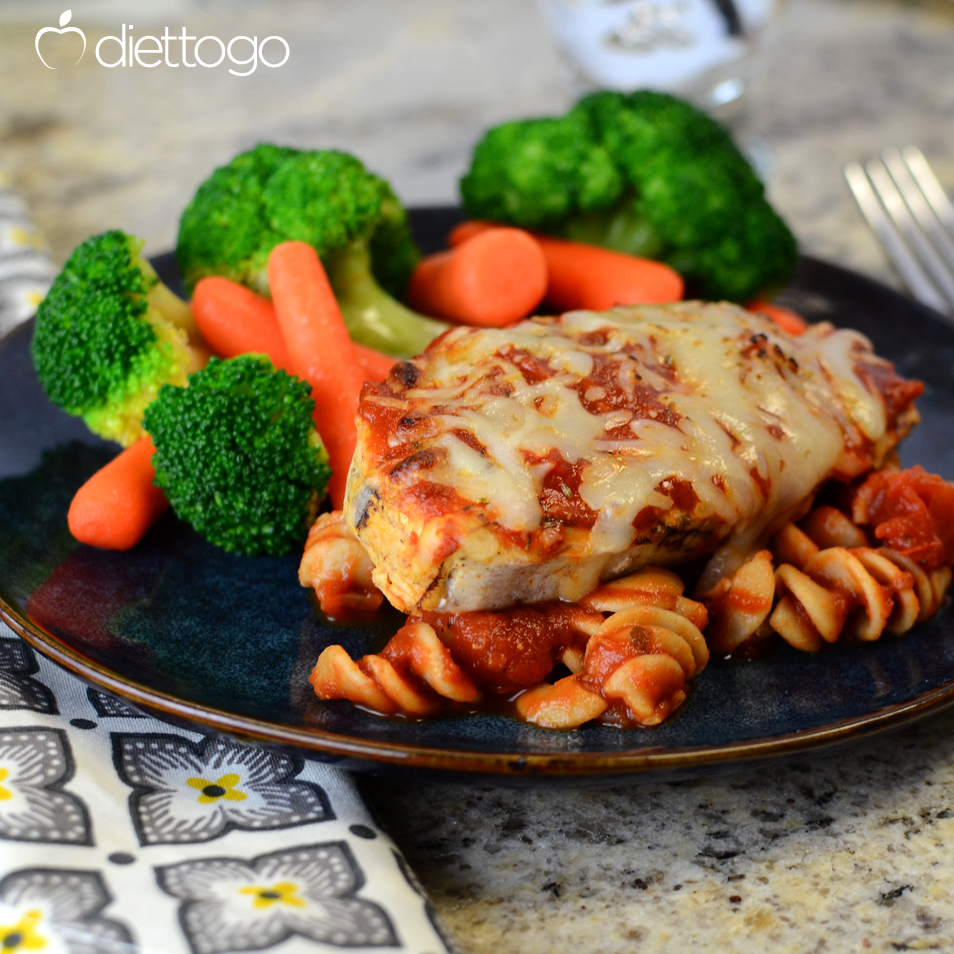
Of the dinner meals my favs were the blackened salmon, a generous chunk of well cooked, fresh tasting fish, and a tasty, good textured salmon black bean burger; both included a puree of cracked wheat, spinach and cauliflower which was tasty although a bit bland. This grew on me and got better as I ate more. However, I found the spicing of most of the meals either too bland or a bit too salty, especially as I cook with limited salt, but I do use a lot of no-salt spices, garlic, red pepper and lemon.* (There was a lemon slice with the blackened salmon but it needed more.) I also liked the Porcini Mushroom Chicken, very moist and tender chicken with delicious mushroom filling, and Eggplant  Parmesan, except for too much pasta under the eggplant. The sauce was really tasty..

My least favorite was the turkey and mashed potatoes with gravy. The turkey had a rubbery texture and both turkey and potatoes were too salty, however, this meal also had green beans and almonds, one of my go-to vegetable dishes, but in contrast to the turkey, they needed a little salt, garlic or some spice but were still good. Even so, they were my favorite vegetable of the whole series and tasted the most like freshly prepared.

The majority of vegetables in the meals were frozen and reheated. They were ok; but had the texture of reheated frozen vegetables. At least they were not mushy or over cooked.

The breakfasts were good. Two had whole wheat bagels ready for your toaster; one with cheese and egg; (obviously a kind of Egg mcBagel). I would caution that it’s messy- when you microwave the cheese you have to be careful to have a plate handy as you take it out- it’s hot and runny! The other bagel breakfast simply had a container of peanut butter. Both bagel meals included a yummy fruit cup–not sweet, just the delicious taste of real fruit. The third breakfast was a whole grain and nut cereal and a 100 calorie yogurt; I thought it very satisfying.

Now I have not much to compare as I rarely eat prepared meals (except occasionally Trader Joe’s or frozen Stouffers); so I think these are good prepared meals for those who want quick, easy to fix, (meals are microwavable in 2-3 minutes) and low carb (based on the 45 carb recommended limit per meal). I have no idea of the cost as I was given these to evaluate for you, my dear readers.

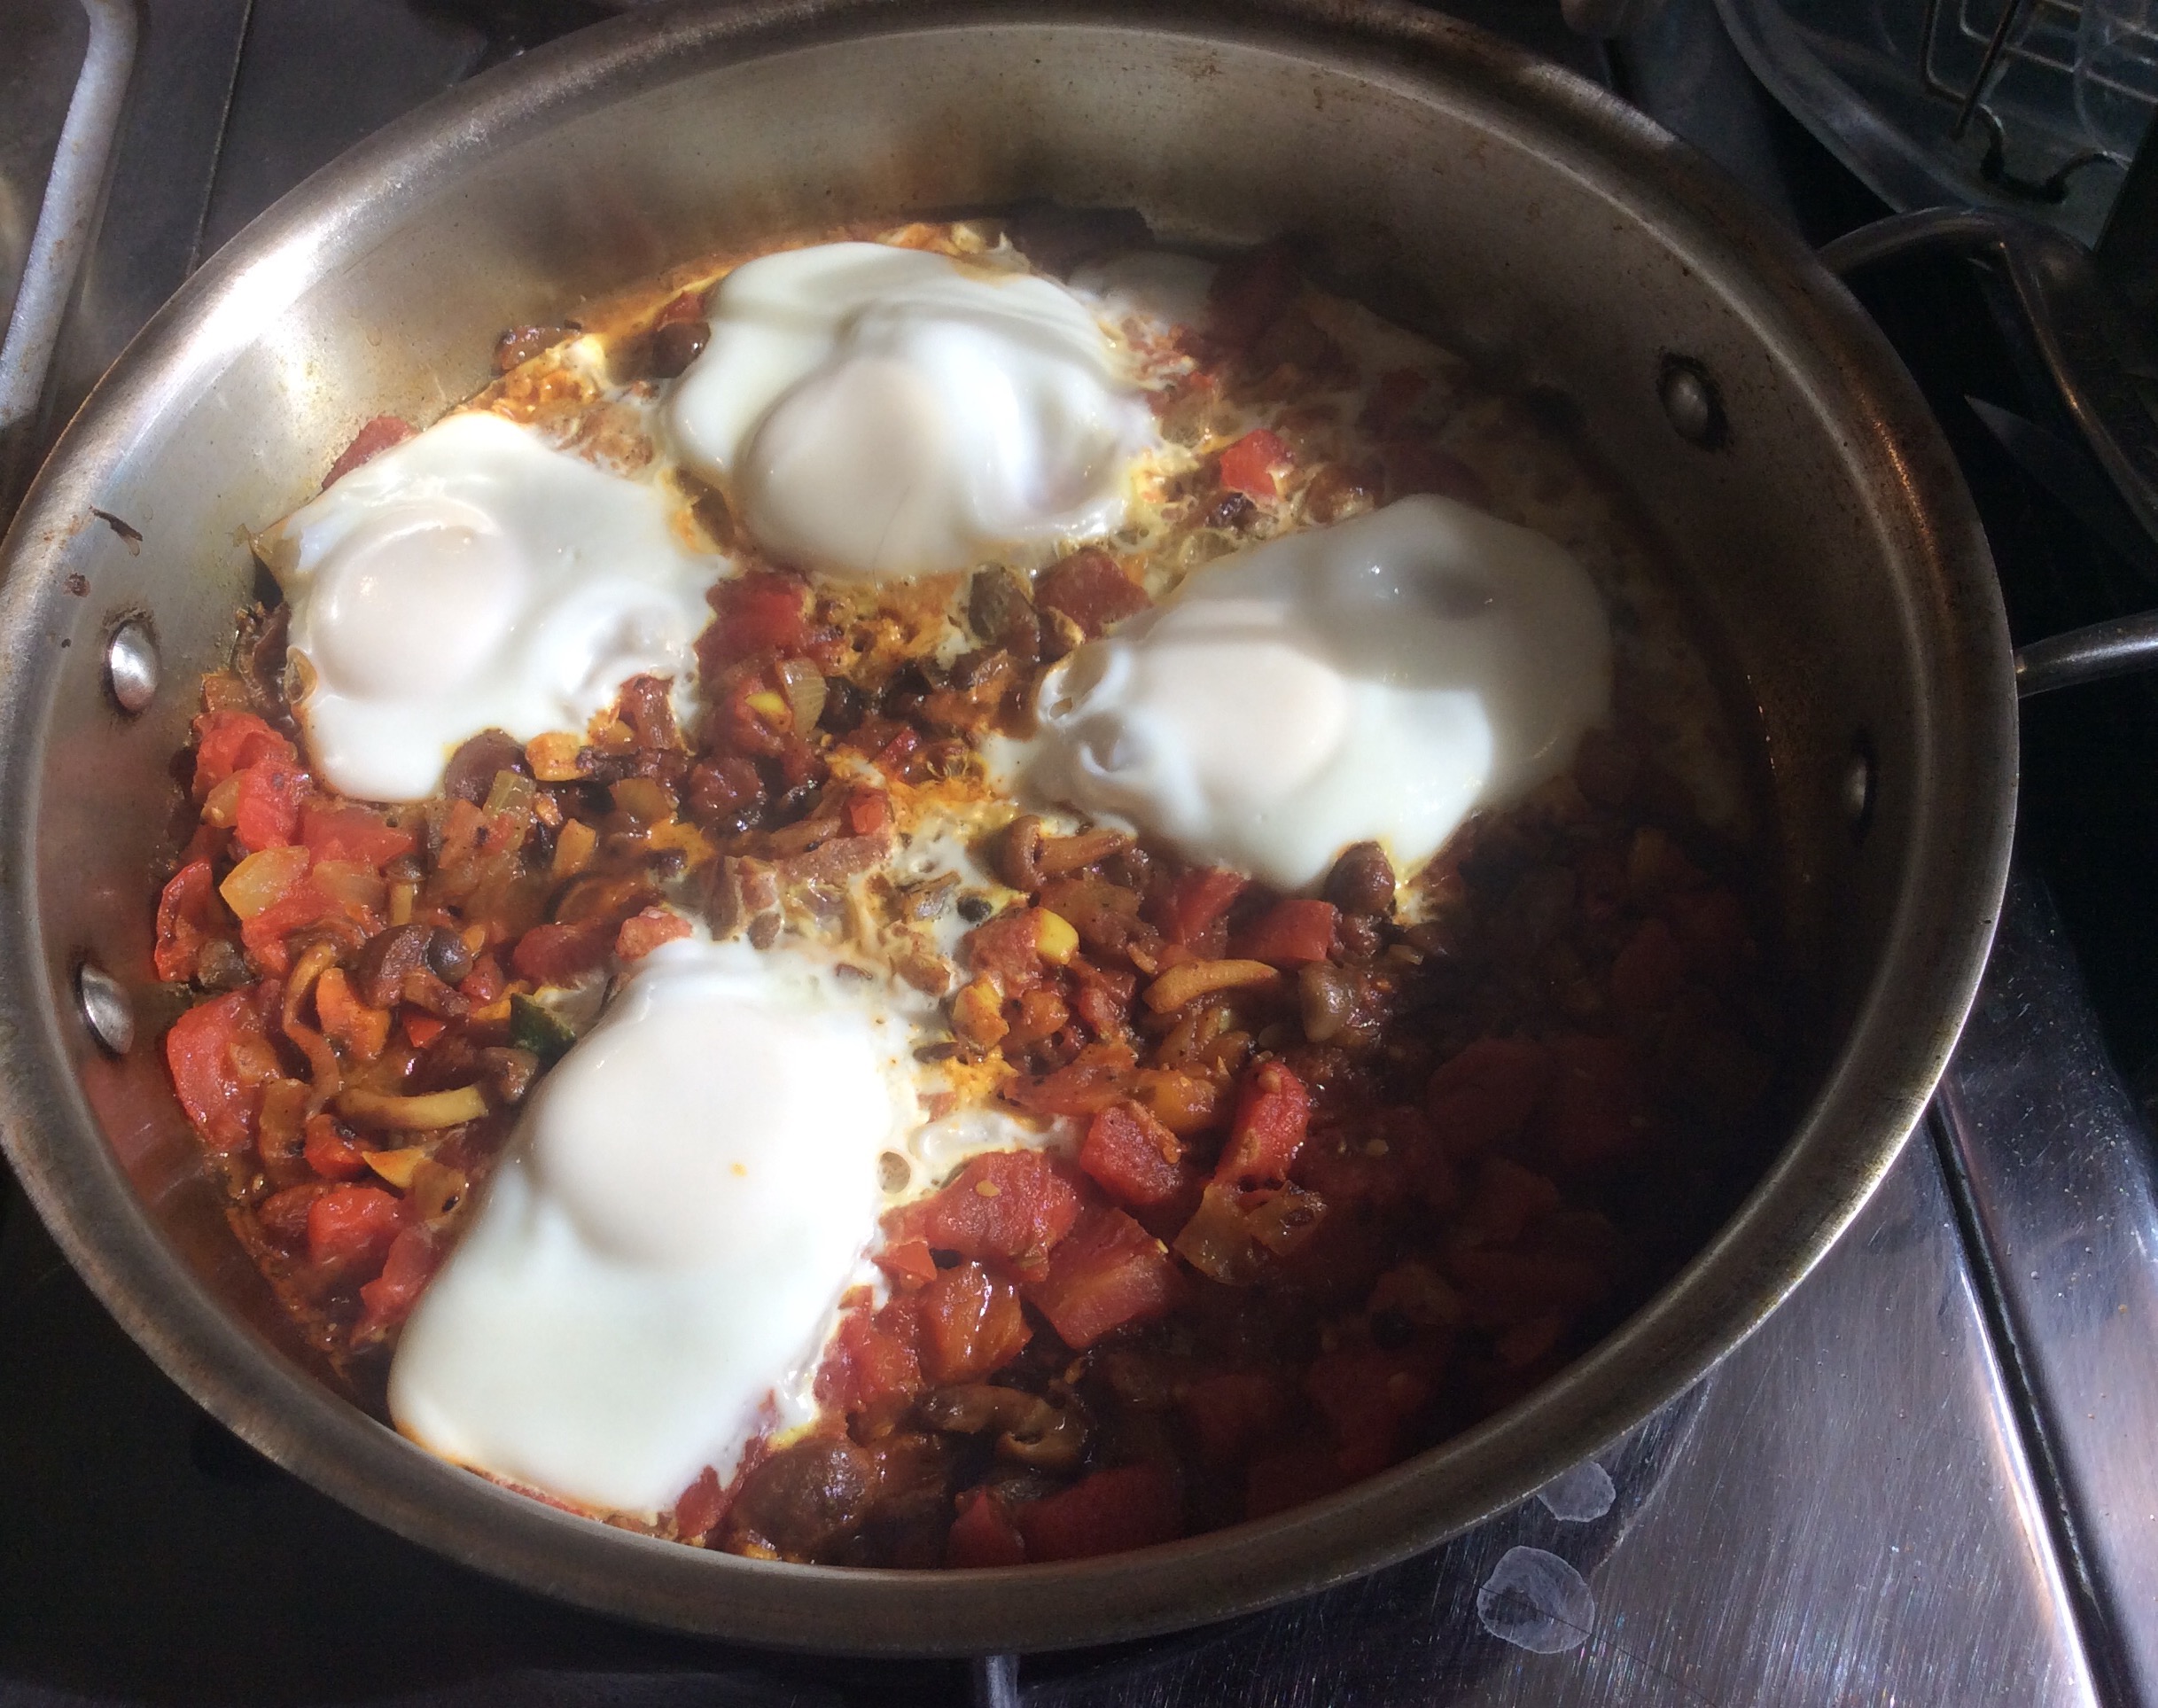
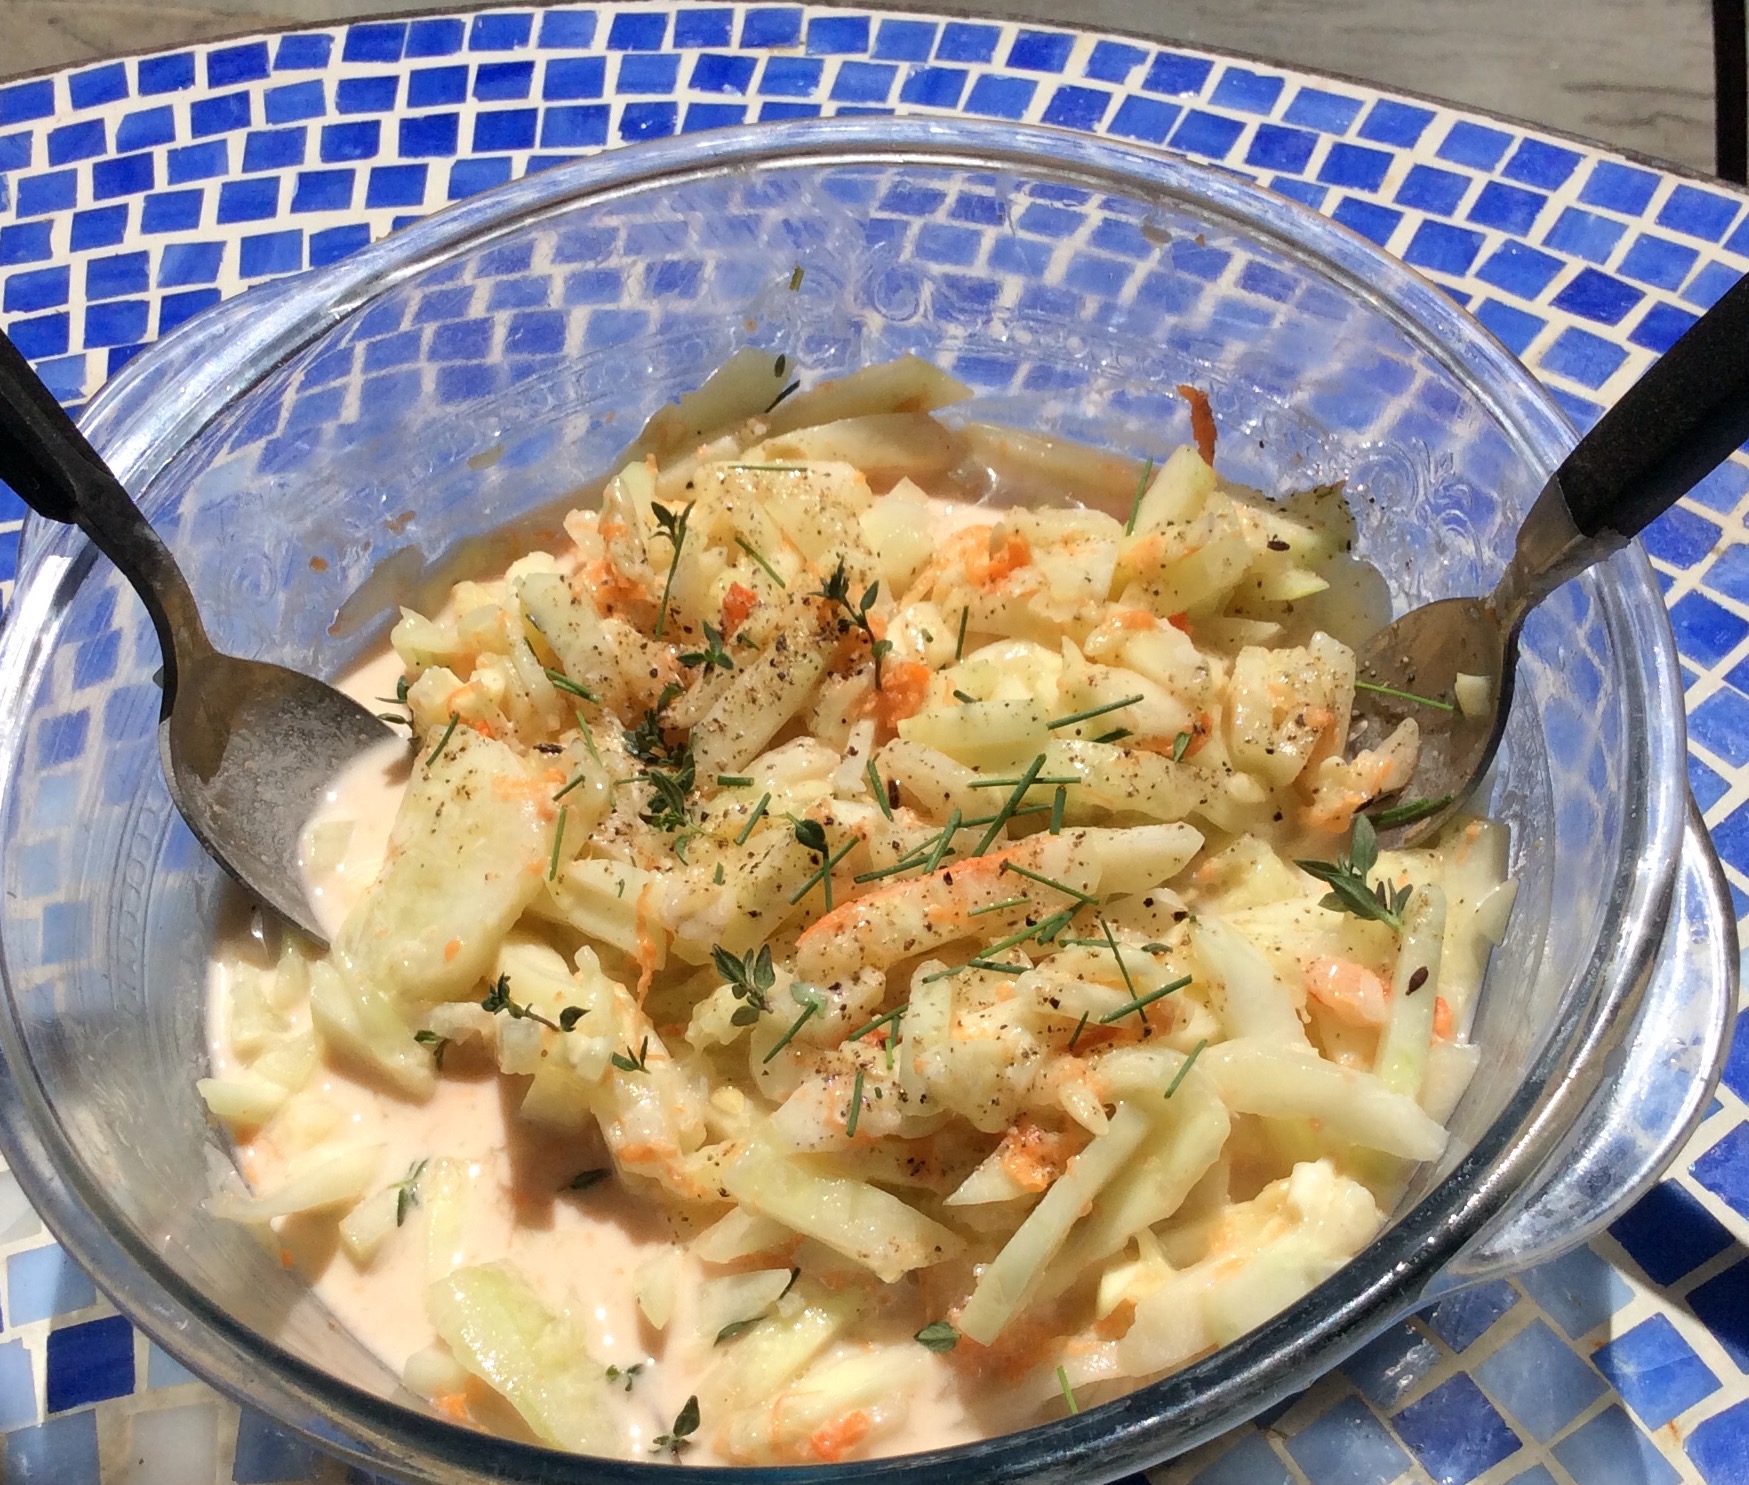
But understand, nothing comes close to freshly cooked foods such as the recipes on type2delicious.com!

*I also suggest that a small low sodium spice packet be included with many of the meal choices and let consumers choose their own amount of salt and additional spices as desired.

image

Blanch Your Veggies! And a sauce to go with…

A variety of colorful blanched vegetables

Beautiful blanched veggies!

imageimageimageWhen much of your diet is low carb and you prepare recipes with lots of vegetables there’s often a great deal of chopping and prep work. Or you eat lots of raw vegetables, especially for appetizers with hummus or other low carb dips. (I admit that can get boring). One way I’ve found to enjoy fresh veggies and have them on hand for snacks and appetizers is to blanch a lot of them at one time.

Actually I’d never blanched a lot of veggies at one time, (I had done a few just for a one time use); then I was invited to a large party and had volunteered to bring hummus and a quantity of veggies. I had had enough of raw veggies for awhile so decided to try blanching them. And it was a revelation! They were so much tastier than the raw–tender, fresh and full of flavor- some crisp, some not so, but still very tasty; (this is a process–there’s a big difference in blanching a few to doing a few pounds). I chose asparagus, carrots, zucchini, yellow squash, red peppers and bright green pea pods- not only good to eat but good to look at–beautiful!

Blanching means boiling vegetables for a few minutes and then plunging them into ice water; one kind at a time. One trick/method I learned from Cook’s Illustrated is to blanch the darker vegetables last as they can discolor lighter vegetables, (as you use the same pot in turn for all the veggies — details in the TO DO section).

I invite you to blanch a quantity and variety of your favorite veggies–store in the fridge for a week of snacks or serve to your guests and/or family for a delicious, healthful treat.

INGREDIENTS/SUPPLIES 

  • 1/2 lb. each of a variety of vegetables (your choice), such as carrots, zucchini, yellow squash, asparagus, snap peas, red pepper, cauliflower…)
  • 1 red and/or yellow pepper
  • A large pot to boil the veggies in
  • a large bowl filled with ice cubes and cold water
  • A large slotted spoon
  • paper towels on a large plate or tray
  • EASY TASTY SAUCE:
  • 1/3-1/2 cup Mayonnaise (Best Foods, or make your own)
  • 1/2 -1 tsp. Siracha (to taste)
  • juice of 1/3 lemon

TO DO:

1. Wash (don’t peel); then slice vegetables into matchstick or 2″ long slices; snap asparagus in half.

2. Prepare ice water bath in bowl next to the boiling water

3. Bring water to boil in a large pot or Dutch oven

4. Add sliced veggies into the boiling water, starting with the lightest colored vegetables; (make sure the water is boiling for each batch). For example, I started with the cauliflower, then yellow squash, zucchini, carrots, peas, asparagus, red pepper).

5. Boil each batch for 1-2 minutes.

6. Immediately lift out with a large slotted spoon or a sieve and plunge into the ice water for 1-2 minutes. (You’ll most likely need to add ice for each batch as the hot veggies will increase the temperature.)

7. Lift out each batch from the ice water and drain on paper towels.

8. Repeat for each type of vegetable.

9. Mix sauce and let sit for at least 1/2 hour.

10. Refrigerate if not serving right away.

Enjoy! www.type2delicious.com

Summer Cucumber Salad

Julienned Cucumbers, carrots in a yogurt sauce

Summertime Cucumer Salad

My German grandmother was a terrific cook. One of her specialties in summer was a refreshing cold salad made of sliced cucumbers in a creamy dressing of red wine vinegar and sour cream, topped with fresh dill or chives. My updated version juliennes the cucumbers, adds carrots and a yogurt-based dressing instead of sour cream. It’s easy to make, very tasty and refreshing as an accompaniment to a summer meal such as grilled chicken or burgers. I like it by itself for a light lunch as well. It also keeps in the refrigerator for at least a few days and gets even more flavor.

It’s a funny thing- somehow marinating the cukes in this dressing makes them more digestible- as I find raw cucumbers sometimes upset my stomach. This salad never has. You can do the cucumber/salt drainage* technique in advance if you like but I confess I rarely have- as I am too impatient!

INGREDIENTS (serves 2-3)

  • 2-3 cucumbers ( medium size- if very large one might be enough)
  • 1/2 medium carrot
  • 1/2-1 cup plain yogurt ( I use whole milk Greek type)
  • 1/3 cup red wine vinegar (it sounds like a lot but the cukes need this amount)
  • 1/2 tsp. Xylitol (see my previous blog posts for more details about this natural no-sugar sweetener)
  • 1/3 cup chopped green onion (optional)
  • salt free seasoning ( or 1 tsp salt if you like)
  • fresh herbs- chives, dill or thyme

TO DO

  1. Make the sauce first so the flavors can meld. Mix the yogurt, red wine vinegar, xylitol and seasonings (not the herbs)– I use a wisk. Taste to make sure it has enough vinegar- should be tangy.
  2. Peel and slice thinly or julienne the cukes- I use a Mandolin with the julienne blade.
  3. Wash carrot, peel or brush well. Juienne or cut into matchsticks and combine with the cucumber; add green onion (optional)
  4. Add dressing and mix well.
  5. Let sit in refrigerator for at least 1/2 hour before serving.
  6. Garnish with fresh chopped herbs.

* To drain and remove excess moisture from peeled, sliced cucumbers in advance of making the salad; put them in a colander with a larger bowl underneath. Sprinkle 1 tsp. salt or more depending on amount of cukes, (sprinkle lightly) and let sit for approximately an hour. You can then blot with paper towels. It does help to keep them crisper and less watery in the salad.

Enjoy!

www.type2delicious.com

Rainbow Swiss Chard

Such pretty rainbow colors!

Such pretty rainbow colors!

The chard stems are cooked first

The chard stems are cooked first

The final cooked chard

The final cooked chard

RAINBOW CHARD

Chard (Swiss Chard) was a new vegetable to me. Rick had made it previously, so I wanted to try it. This is really his recipe.

We buy rainbow chard at the farmer’s market– so pretty, so easy and so delicious! I love the colors! If available, choose the rainbow variety, though the plain Jane is just as tasty. Also, of course, both are low carb, and full of good greens; see the link below for nutritional info. http://www.whfoods.com/genpage.php?tname=foodspice&dbid=16

INGREDIENTS

  • 1 -2 bunches Rainbow (or just green) Swiss Chard
  • 1-2 Tbsp. Olive oil
  • 3-4 Tbsp good balsamic vinegar
  • Salt free seasoning/pepper to taste

TO DO: 1. Wash the chard (I use a large colander and wash each large leaf ) 2. Strip the leaves from the stems and cut off ends and discard any large, tough stems. 3. Chop stems into 1/2 or 1″ pieces, then chop leaves into I” pieces; separate stems from leaves. 4. Preheat a large sauté pan, add oil. Add vinegar. 5. Saute stems for approx. 10 min., then add leaves, and saute approx another 10 min. until vinegar is reduced. 6. Add spices and seasonings to taste. Enjoy! www.type2delicious.com

Low Carb Clafoutis–Fun Fruit Dessert!

No-sugar fruit dessert made with peaches

Summer fruits beg to be eaten and one delicious way is a low carb, no-sugar version of the French fruit dessert, clafoutis.

I make it with Xylitol*, a low carb sweetener that my readers will recognize- it has no weird aftertaste and allows folks with carb restrictions to enjoy at least some sweet tasting desserts to their low carb diet.

Clafoutis! Just the name makes me smile- such a cute word for such a tasty dish! I made this version mainly with peaches, (and a nectarine), but I’ve made it with plums with just as delicious results; (if you read my previous recent blog posts, you’ll know we had a bumper crop of plums last year).

Clafoutis is originally from France, made with dark cherries that traditionally aren’t pitted. There’s a chemical, amygdalin, in the pits which gives a unique flavor. However, I’ve never made it that way. In any case, I’ve been a clafoutis fan this summer especially, and have made it almost every time we’ve had dinner guests. I can’t have it too often!

In winter or fall, it can be made with apples and/or pears. I look forward to trying it then too, but now I am reveling in the summer fruit version.

INGREDIENTS (serves 2-3)

  • 4-6 fruits sliced, – peaches, plums, nectarines (depending on size), in any combination; peeled if you like, (I usually don’t peel them). The main thing is to cover the bottom of the pie plate.
  • 3 eggs, beaten
  • 1 1/3 cup milk (or milk substitute- I’ve used almond milk, for instance)
  • 2/3 cup flour- I use King Arthur whole wheat white flour
  • 2 Tbsp. Almond meal (Trader Joe’s has this–I keep a bag in my freezer–lasts a long time)
  • grated peel of one small lemon
  • 1 Tsp. Vanilla
  • 1 pinch salt
  • 1 tsp. Cinnamon
  • 6 Tbsp. Xylitol
  • butter for greasing pan

TO DO: preheat oven 375 degrees F

1. Butter a 10″ pie pan (I use a glass one) and sprinkle 1 Tbsp. of the Xylitol  over the bottom.

2. Arrange the fruit slices so that they cover the entire bottom of the pan. Sprinkle 2 more Tbsps. of Xylitol over the fruit.

3. Combine the remaining Xylitol, eggs, milk, flour, lemon zest, almond meal, vanilla and salt (remember, just a pinch- about 1/4 tsp.); blend in a blender or use an immersion blender.

4. Pour this liquid over the fruit in the pan.

5. Bake for 50-60 minutes until “toothpick” firm and the top is lightly brown. Remove from the oven and place on a rack.

6. Let stand at least 30 minutes before slicing. (if you have no restrictions, vanilla ice cream is great with this.)

That’s it! A real treat!

* https://en.m.wikipedia.org/wiki/Xylitol

Enjoy! www.type2delicious.com

Grandma’s Fresh Applesauce with Cinnamon

<img alt=" Fresh no sugar applesauce with cinnamon"

Fresh Applesauce with Cinnamon!

IMG_1378

It’s fresh fruit season! Our apple tree is full of fruit and apples are dropping all over our yard. So naturally it’s applesauce time! I realize that usually apples are an autumn crop but somehow ours are ripe now.

My grandma made the best applesauce –kinda chunky yet tender and very flavorful. Her secret was use mainly white wine, lemon juice, cinnamon and a very little water, if any. And yes, sugar. It was always a special treat. And now there’s a way to make Gran’s applesauce without sugar or weird tasting substitutes.

One legitimate lament of diabetics and other carb conscious folks is the lack of sweets and desserts in the diet. One solution I’ve found is making desserts with fruit and using a sugar substitute called Xylitol to add sweet flavor with limited carbs; (the label states that it is “75% fewer carbs than sugar” with “40% fewer calories”). There are 4 gms of carbs per tsp. and 10 calories. (Note: I have no relationship with any Xylitol manufacturers or distributors.)

I use it sparingly in any case, but it definitely makes desserts such as this tasty cinnamon applesauce very satisfying without sacrificing flavor. It’s also easy to make (and smells divine while cooking). I’m sure it will become a staple in your household as it is in mine!

I also make a delicious fresh plum jam using Xylitol and no sugar; recipe to come.

INGREDIENTS (serves 4-6)

  • 2-3 lbs. fresh apples (best from a tree or farmer’s market)
  • 1-2 Tbsp. lemon juice
  • 1/2 cup white wine (I like to use any Sauvignon Blanc from Marlborough area of New Zealand); you may add more if the apples are too dry.
  • 1/3 cup Xylitol
  • 1-2 tsp. ground cinnamon, and 1 cinnamon stick
  • 1/4-1/3 cup water as desired or needed
  • 1/2 cup blueberries (optional; you can add blueberries if you like–I like it “straight” best but sometimes add them for a variation, especially if there are an abundance at the local farmer’s market.)

TO DO

  1. Rinse, peel and chop the apples; you can leave some skin on; chop roughly into about 1″ pieces.
  2. Add apple pieces into a large cast iron or dutch oven, on the stovetop with medium high heat.
  3. Add white wine and Xylitol, and cinnamon stick.
  4. Stir constantly, until the apples are bubbling.
  5. Cover and turn down the heat to low, and cook for approximately 1/2 hr., stirring every so often, until the apples are tender. Add additional liquid in small amounts as needed (apples should be moist).
  6. Add lemon juice and ground cinnamon to taste.


Enjoy!

www.type2delicious.com

Asian Chicken/Veggie Stir Fry

Freshest ingredients!

Freshest ingredients!

This is one of our favorite dushes- fresh and tasty!

This is one of our favorite
dishes- colorful and tasty.

imageWe enjoy cooking together.

Sometimes I’m the Sous Chef; or take the lead. (Rick says I’m then the Chief Sue Chef).

For this favorite recipe I do much of the veggie prep, and Rick does the final stir frying. I make the sauce, though, as it’s one of my specialties; a low carb version with Asian flavors.  This dish, full of delicious fresh vegetables, is colorful, flavorful and very satisfying and a great addition to a low carb diet plan.

One trick with stir fry is to chop vegetables approximately the same size, and to cook in batches, starting with ingredients that take longer, such as onions, peppers and carrots. Then add those that cook more quickly, such as green onions and zucchini. Of course, be careful not to overcook as some crunch is part of the enjoyment.

Fresh Asian Veggie/Chicken Stir Fry

INGREDIENTS (serves 2-4)

  • 1 large onion, chopped
  • 1/2 cup mushrooms, sliced
  • 1/2 cup sugar peas in pods
  • 2-3 medium carrots, sliced diagonally into 1/2″ cubes (for fun, I use a variety of different colored carrots)
  • 2-3 green or spring onions, sliced diagonally in 1″ pieces including the green parts
  • 1 small red pepper and 1 small yellow pepper, sliced into 1/2 ” pieces
  • *Lemon grass, sliced diagonally in 1″ pieces
  • 1 lb. chicken breast fillet, chopped into 1″ slices
  • 1-2 Tbsp. Safflower or other high heat cooking oil
  • 1″ knob of fresh ginger for grating
  • Optional: cilantro and/or chopped peanuts for garnish
  • SAUCE
  • * 2 tsp. fish sauce (it’s salty but used sparingly gives the Asian umami flavor that we like.)
  • 1/3 cup Mirin (rice wine)
  • 1-2 Tbsp. Xylotol (low carb sweetener)
  • 1/2 cup water
  • Combine all sauce ingredients and heat on medium heat until Xylotol is dissolved. Remove from heat.

TO DO

1. Chop all vegetables and arrange them by cooking times.

2. Heat 1 Tbsp of oil on high heat in a wok until sizzling; add chicken pieces and stir fry until no longer pink on all sides; 3-4 minutes. Remove from the wok.

3. Add peppers, carrots and onions to the wok; stir fry for 3-5 minutes until onions are transparent. Remove from the wok.

4. Add remaining oil. Adjust heat as needed. Add mushrooms, zucchini, green onions and lemon grass to the wok. Stir fry 3-4 minutes.

5. Return all ingredients to the wok; add sauce and mix through.

6. Grate fresh ginger and mix again.

Serve in bowls with brown rice or quinoa. Garnish bowls with cilantro and/or chopped peanuts. (We serve cilantro separately as to some folks it tastes like soap!)

* Lemon grass and fish sauce are staples of Thai and Vietnamese cooking and can be found in most Asian markets; also some Whole Foods and other specialty-type groceries.

Enjoy! www.type2delicious.com